Jenkins Home Lab
A guide for building a complete Jenkins home lab
- Jenkins Home Lab: Part 1 - Setting up the Master
-
Jenkins Home Lab: Part 2 - Setting up Linux Agents (Ubuntu & Raspberry Pi systems)
- Jenkins Home Lab: Part 3 - Setting up Windows Agents
- Jenkins Home Lab: Part 4 - On-Demand Linux Agents with Docker
Today we’ll look at setting up linux agents. These instructions apply to Ubuntu and Raspberry Pi / Raspbian systems, but should work for any debian based system. With some very minor tweaks these instructions should work pretty similarly for most linux systems.
Generate an SSH key
We’ll need an SSH key to authenticate the connection between the master and the agent. Generating an SSH key is quite simple. On a linux or mac command line enter this command
$ mkdir jenkins-ssh-key
$ ssh-keygen -t rsa
This will start generating the key files required, gathering some information in the process. When prompted enter the path below, and just press enter without specifying a passphrase.
Security Note For increased security you should specify a passphrase.
jenkins-ssh-key/id_rsa
The output will look like this
Generating public/private rsa key pair.
Enter file in which to save the key (/home/pi/.ssh/id_rsa): jenkins-ssh-key/id_rsa
Enter passphrase (empty for no passphrase):
Enter same passphrase again:
Your identification has been saved in jenkins-ssh-key/id_rsa.
Your public key has been saved in jenkins-ssh-key/id_rsa.pub.
The key fingerprint is:
CENSORED
The key\'s randomart image is:
+---[RSA 2048]----+

CENSORED

+----[SHA256]-----+
This will generate 2 files, a public key called id_rsa.pub and a private key called id_rsa. The private key will be entered into the Jenkins Credential system, while the public key will be added to the authorized_keys file on each linux agent that is going to be added.
Configuring the linux agent
There are 3 steps to configuring the agent:
Install Prerequisites
Log into the console of the linux system and install the java runtime
$ sudo apt update
$ sudo apt install default-jre -y
Create a user called jenkins
We need to create a user that the agent will run under. Enter the command below and follow the prompts.
$ sudo adduser jenkins

Adding user 'jenkins' ...
Adding new group 'jenkins' (1001) ...
Adding new user 'jenkins' (1001) with group 'jenkins' ...
Creating home directory '/home/jenkins' ...
Copying files from '/etc/skel' ...
New password:
Retype new password:
passwd: password updated successfully
Changing the user information for jenkins
Enter the new value, or press ENTER for the default
	Full Name []:
	Room Number []:
	Work Phone []:
	Home Phone []:
	Other []:
Is the information correct? [Y/n] y
Security Note This is the account that Jenkins will execute jobs under. You may need to add permissions for this user to access resources, however, be aware that generally you’ll be pulling build scripts from version control systems and possibly external sources which could be a security risk.
Add SSH public key to authorized_hosts
Login or su to the jenkins user. You can either copy the public key file to the linux agent and execute the command below, or you can just manually paste the contents of the public key at the bottom of the authorized_keys file, which you can create if it doesn’t exist. This file should be at /home/jenkins/.ssh/authorized_keys
$ mkdir ~/.ssh
$ cat id_rsa.pub >> ~/.ssh/authorized_keys
Security Note The authorized_keys file should have 644 permissions and be owned by the user. More information is available on the Ubuntu OpenSSH keys page.
Register agent in Jenkins
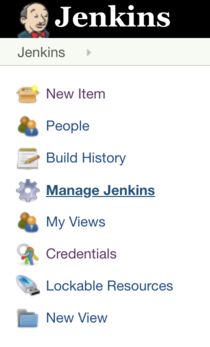
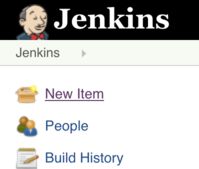
Click on Manage Jenkins
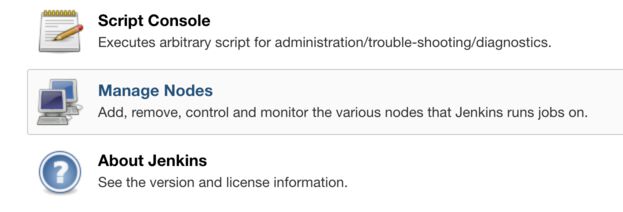
Click on Manage Nodes
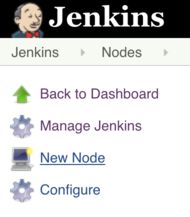
Click New Node
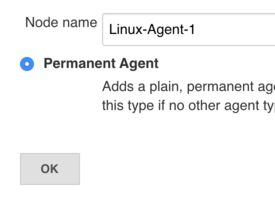
Enter a name, choose Permanent Agent and click OK
Here we want to enter a few details
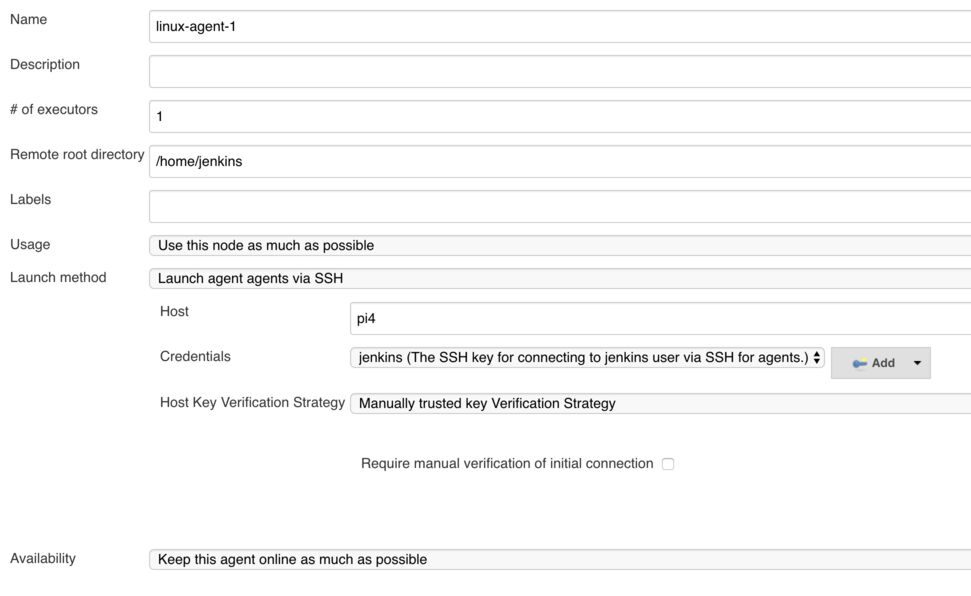
- Name: Name of the node to be displayed in Jenkins
- # of executors: how many jobs should be able to concurrently run on this agent, generally set this to the number of cores available.
- Remote root directory: /home/jenkins/jenkins_root
- Labels: a list of labels associated with this node. This can be used to restrict jobs to this node or node type. I like to put in operating system and architecture.
- Launch method: Launch agent via SSH
- Host: the hostname or ip address of the system that will be running the agent
- Credentials: Here is where we specify the private key that we generated at the first step. If you are adding a second agent then you can just select the credentials created previously. If this is the first agent you can read further instructions below
- Host Key Verification Strategy: Manually trusted key verification strategy.
Security Note There are several host key verification strategies, if you are working in a larger IT environment you likely have the ability to manage known_hosts centrally. You should look at all these strategies and choose what works best for your environment.
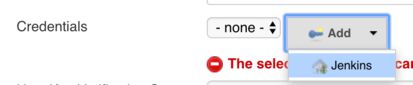
Adding the credentials
To add the credentials click the Add button, and then click Jenkins.
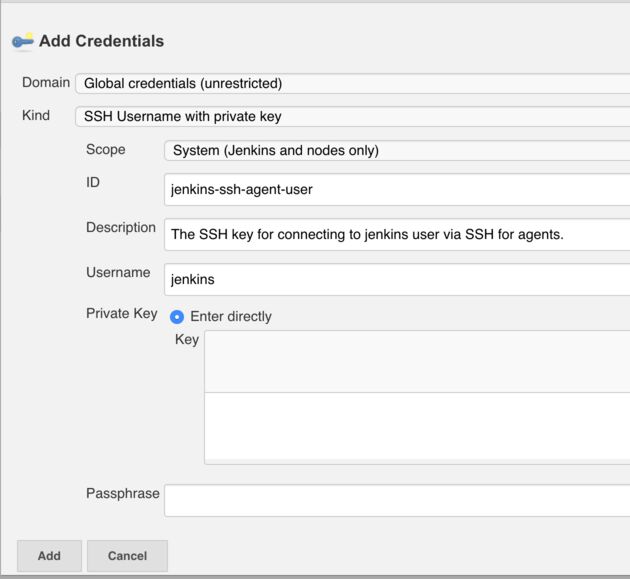
Here again a few things need to be configured:
- Domain: choose the Global credentials domain
- Kind: SSH Username with private key
- Scope: System
- ID: jenkins-ssh-agent-user
- Username: jenkins
- Private Key: paste in the contents of the file id_rsa that was generated earlier
Then press add. This will return to the agent details screen where you can select it from the drop down menu.
Security Note You can setup domains for credentials which group them together. As you have more teams, developers and others using Jenkins it’s a good idea to start keeping credentials separated by team or project. Here we are using the global domain. You can read more about credentials in the Handling Credentials section of the Jenkins User Handbook.
Finishing the job
After clicking save, the agent will start, but may take a few seconds to appear in the bottom left.
Create A Test Job
To ensure this is working we’ll create a job which will print some system information to ensure that jobs are executing on this agent.
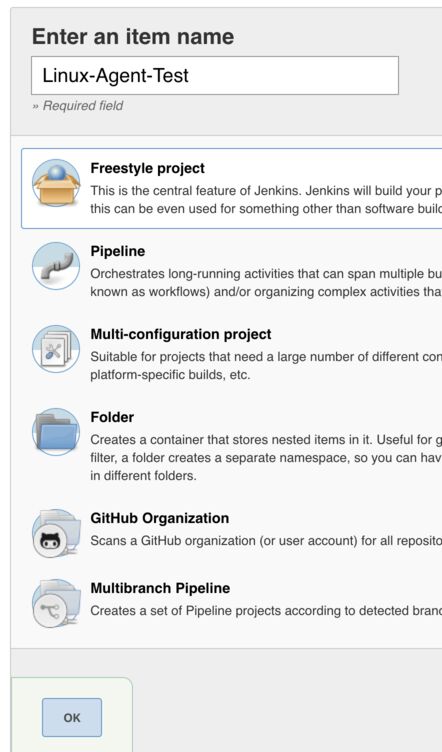
Go back to the home page of Jenkins and click New Item
Enter a name for this job, Linux-Agent-Test and choose Freestyle Project
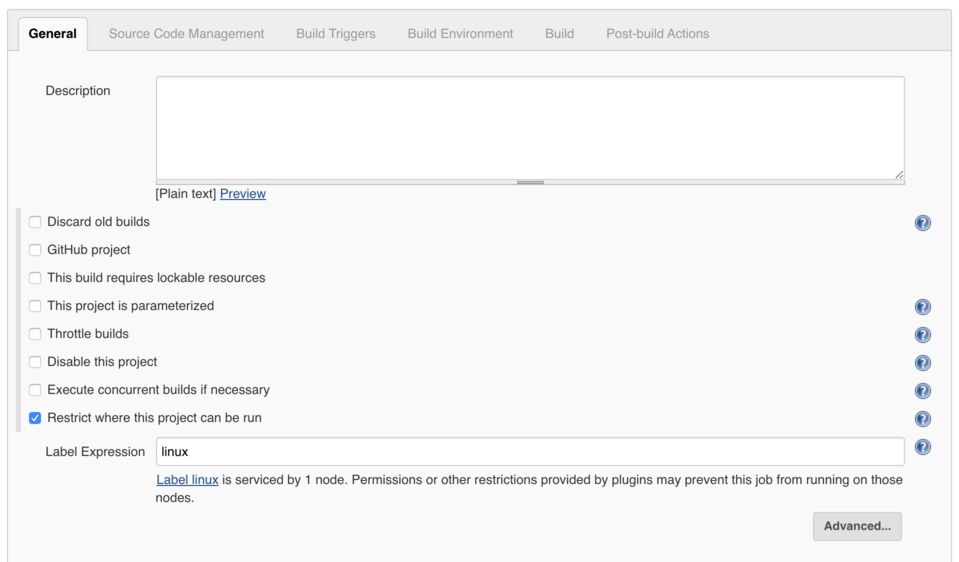
In the job we’ll configure a restriction for where the job can run, tick “Restrict where this project can be run” and then enter the expression “linux”. This will find the label that was applied to the configured agent. When we add a windows agent tomorrow this build will already be restricted from running on it
In the Build section, add a build step “Execute shell” and then enter the code below. This will print system information and all the environment variables.
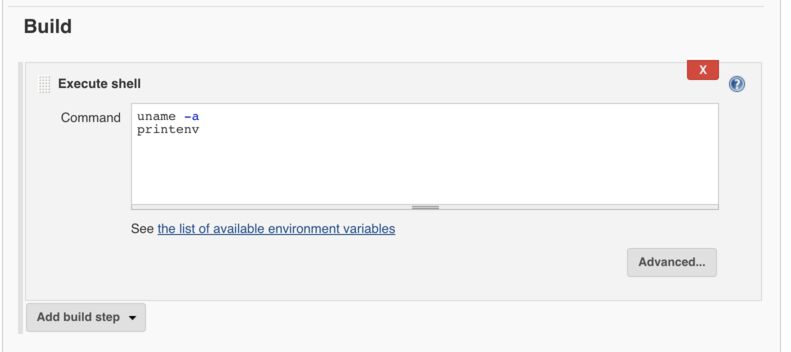
uname -a
printenv
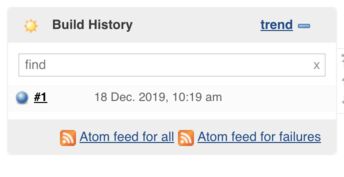
After clicking save, you will be returned to the main page for the project. Click “Build Now” and you will see a job run and appear in Build History. You may have to refresh the page.
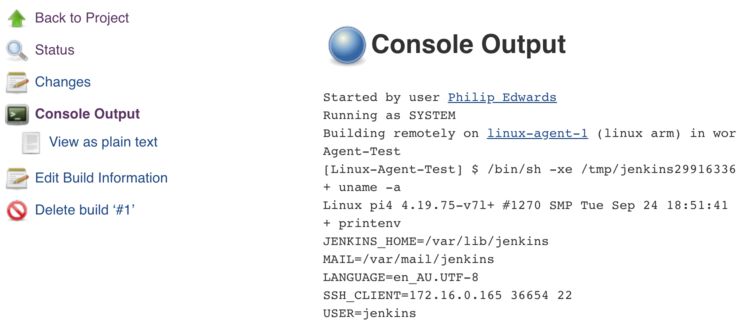
Once the job has turned blue, click the build number next to the circle which will take you to the build page.
On the build page you can see some information about this build. Click Console Output to see what was printed by the shell commands.
What’s next?
Congratulations, you now have a linux agent able to run any linux based jobs. Tomorrow we’ll look into configuring a Windows agent.
Continue on with Part 3 - Setting up Windows Agents
Share